Scanning for VPS
The scanning framework supports scanning certain locations and uploading the results to activate more locations for ARDK’s VPS functionality. See Generating Scans for VPS for more information about generating scans for VPS. If you have not yet setup a Unity project with scanning, see Getting Started with the Scanning Framework.
To use this feature, follow the steps below for guiding your users to scan targets, uploading scans, adding user guidance, and executing a VPS scan quality check.
Note
This is a Public Beta feature and functionality may change in a future release. For more information on ARDK feature launch types like Public Beta, see Lightship Launch Types.
Steps
1. Guide your Users to Scan Targets
Use the ScanTargetClient interface to obtain nearby locations that are eligible to upload scans for VPS activation:
_scanTargetClient = ScanTargetClientFactory.Create(runtimeEnvironment, mockResponses);
_scanTargetClient.RequestScanTargets(coordinates, queryRadius, (ScanTargetResponse response) => {
  if (response.status == ResponseStatus.Success) {
      List<ScanTarget> scanTargets = response.scanTargets;
      /** store and process scan targets. */
    }
});
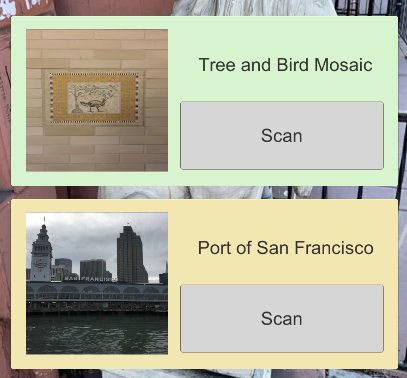
This image shows an example UI to display the nearby scan targets for users.
Once a user deterimines a scan target, set it on the Scan Manager and start scanning:
_arScanManager.SetScanTargetId(scanTargetId);
_arScanManager.StartScanning();
Note
The current version of the Scanning framework only supports scanning public outdoors scan targets. To submit scans of private locations, see Using the Niantic Wayfarer App.
2. Upload Scans
You can process the rest of the scan as normal. Make sure to check Processing Scans and choose the recommended settings for VPS scanning. After a scan is processed and saved, use ARScanManager’s UploadScan method to upload scans to Niantic for them to be processed for VPS activation.
The uploading can be done at a later time from a saved scan, as long as the scan target ID is set at the time of scanning.
string scanId = ...
_arScanManager.UploadScan(scanId, (float progress) => {
  /** handle progress */
}, (bool success, string error) => {
  if (success) {
  /** handle upload success*/
    } else {
  /** handle upload error */
    }
});
The upload method takes a
scanIdand 2 callbacks. The first callback is called during the uploading with a float progress parameter. The second callback is called when uploading completes, it will provide the status of the callback as well as an error message in case of failure.
You can see the scanning upload flow implemented in the ScanningUpload example scene.
3. Add User Guidance
The Niantic Scanning Framework collects personal data from end users which may be subject to privacy regulations. You should therefore ensure you are requesting appropriate permission from your end users to collect this personal data.
If your scanning use case will send scans back to Niantic, you must advise end users of the following via a pop up that is actively acknowledged on first use of the scanning feature:
If the scanning feature is enabled, the end user can opt out at any time.
Not to scan inside private residences or from publicly inaccessible locations.
You must also provide users with a mechanism to change their minds about opting in to using the scanning feature.
To ensure your users are scanning in a safe environment, we also recommend displaying a one-time warning in your app when your user first tries to scan. The warning can be a simple one-line warning similar to: “Do not scan in dangerous environments”.
Users should also ensure they have permission to scan the object or area they are scanning. Some locations, such as cemeteries, playgrounds, schools, and other places with identifiable children, may not be appropriate places for scanning.
Additionally, for the best user experience you should provide guidance in your app on scanning best practices. These include:
Users should “shuffle” their feet when scanning instead of stepping, this helps with the stability of the scan.
Users should make sure to circumnavigate the scanned object or Wayspot as they scan.
When scanning Wayspots, the horizon should be visible in the scan, to improve localizing with the scan.
Users can imagine they are “painting” the object being scanned, as if their phone is a spray can.
4. Ensure VPS Scan Quality
Scanning for VPS requires the right set of techniques for optimal mesh and tracking quality. For detailed guidance, see Scanning Best Practices
The Scanning Framework also provides an on-client scan quality check to indicate the scan quality, and possible reasons of a bad scan after the user takes a scan. To use the feature, call GetScanQuality on ARScanManager, or get an IScanQualityClassifier from IScanner, then call ComputeScanQuality.
The quality check returns a score between 0 and 1: the higher the score is, the more likely the scan is good for building the map for VPS. In the case where the quality check detects one or more signals of a bad scan, it will also display all the possible bad scan quality reasons detected. See below for all the bad scan quality reasons:
Reason |
Description |
Example |
|---|---|---|
TooBlurry |
The scene is too blurry to be understandable. This could be due to fast movement, dirty lense, or camera out of focus. |
|
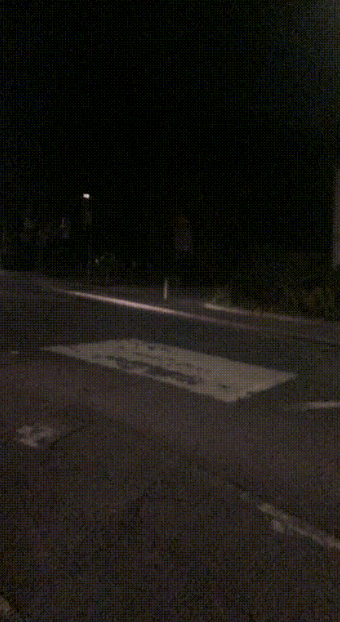
TooDark |
The scene is too dark to be understandable. |
|
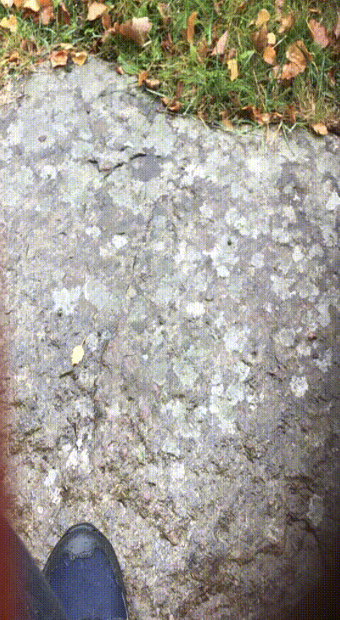
GroundOrFeet |
The scan is too focused on the ground or the feet. |
|
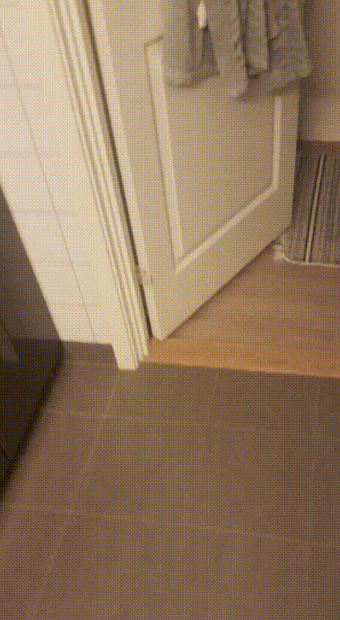
ScanIndoors |
The scan is indoors. |
|
ScanFromCar |
The user is scanning from the inside of a car. |
|
Obstructed |
The scene is obstructed partly or fully by a finger or a large object. |
|
TargetNotVisible |
The scan target is not clearly visible in the scan. |
|


Next Steps
See Scanning Best Practices for more information on VPS scanning, and Scanning Settings for more information on visualizing and processing scans.