Building ARDK Apps for Android
Use the following steps to build and deploy your ARDK app to Android devices.
Note
If you are planning to submit your app to the Google Play Store, your app must meet Google Play’s target API level requirement, which is currently API level 31. Building ARDK apps for API level 31 using Unity 2021 requires installing and configuring a newer version of gradle, as described in Building for Android API level 31 with OpenCL. Note that ARDK 2.3 currently requires installing the newer version of gradle.
Prerequisites
You should have a Unity project configured with the ARDK package, as described in Adding ARDK to Unity.
Your Unity project should have an Authentication asset configured with your API key, as described in Authentication.
You should have an Android device compatible with ARDK. See “Runtime Requirements” in System Requirements for a list of compatible Android devices and minimum Android versions.
Your Unity scene should be configured to request Android permissions such as camera and location permissions, as described in Permissions.
Steps
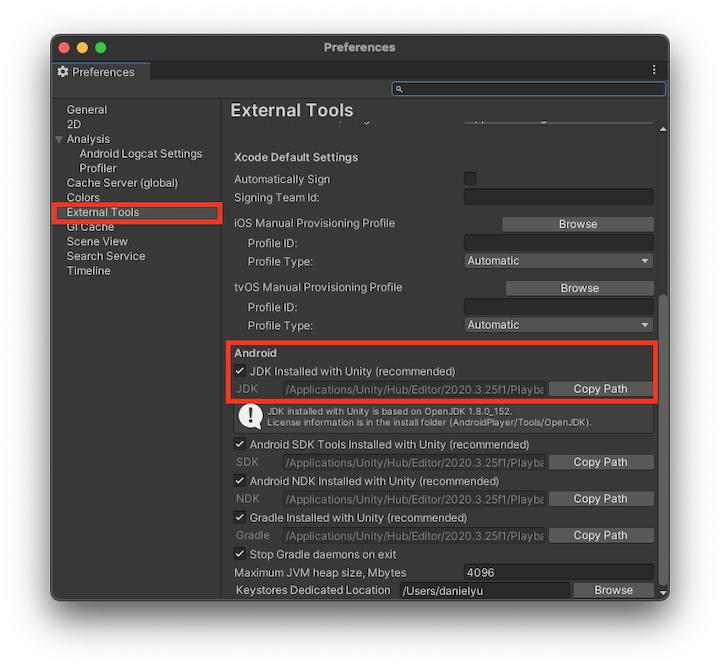
Open the External Tools window (Unity> Preferences) to specify your Android SDK and NDK paths. It is recommended to select the Use embedded JDK option.
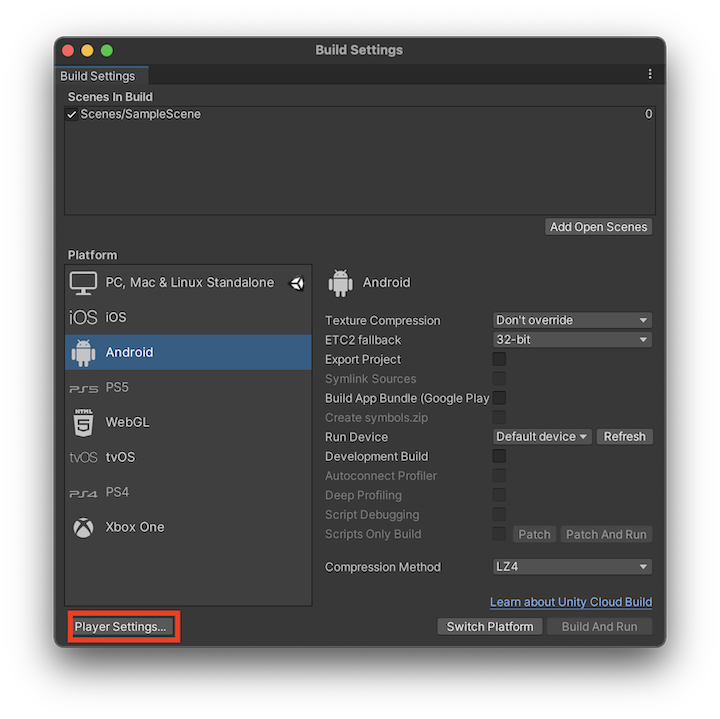
Access the Build Settings (menu: File > Build Settings) and open Player Settings.
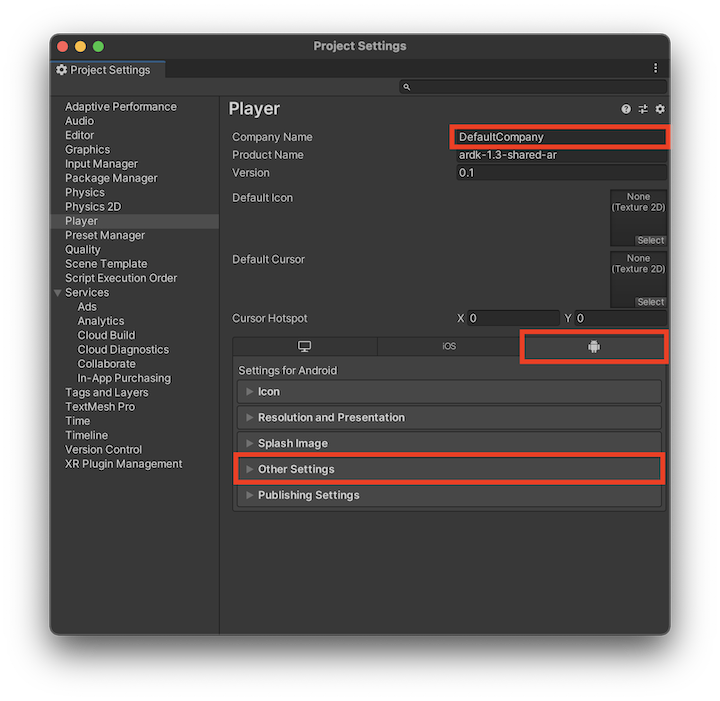
Change the Company Name to your organization’s name. Then navigate to the Android> Other Settings pane to specify your build settings.
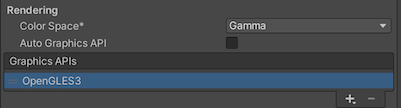
Under the Rendering section, uncheck the Auto Graphics API setting, and remove the Vulkan renderer if it is present. ARCore and Vulkan will not work together.
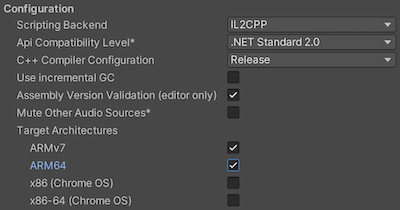
For Scripting Backend choose IL2CPP. Choosing Mono may cause crash issues when using awareness features.
For Target Architectures select both ARMv7 and ARM64. Note that ARCore does not support running 32-bit only apps on some 64-bit devices.
Some other settings and their effects on your application:
Setting |
Value |
Function |
|---|---|---|
Multithreaded Rendering |
Enable this option to use multithreaded rendering. Both enabling and disabling this option is supported by ARDK. |
|
Package Name |
Set the application ID, which uniquely identifies your app on the device and in the Google Play Store. |
|
Minimum API Level |
Android 5.1 ‘Lollipop’ (API level 22) |
Minimum Android version (API level) required to run the application. In Unity 2020 this value is Android 5.0. |
Target API level |
Automatic (highest installed) |
Target Android version (API level) against which to compile the application. For API level 31 and higher see notes below. |
Note
If your target API level is set to API level 31 or higher, after you complete these build configuration steps, you will need to update the version of gradle that Unity uses to build, as described in Building for Android API level 31 with OpenCL. Note that ARDK 2.3 currently requires installing the newer version of gradle.
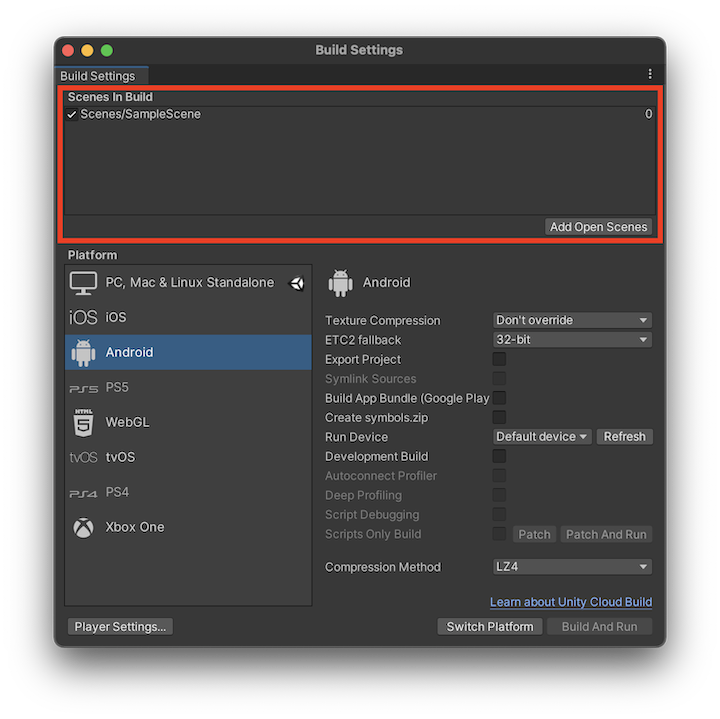
Back in the Build Settings window, the Example/StarterScene should be automatically added and checked inside the Scenes In Build box. If it is not checked, find the scene in the Unity Project window and drag it into the box.
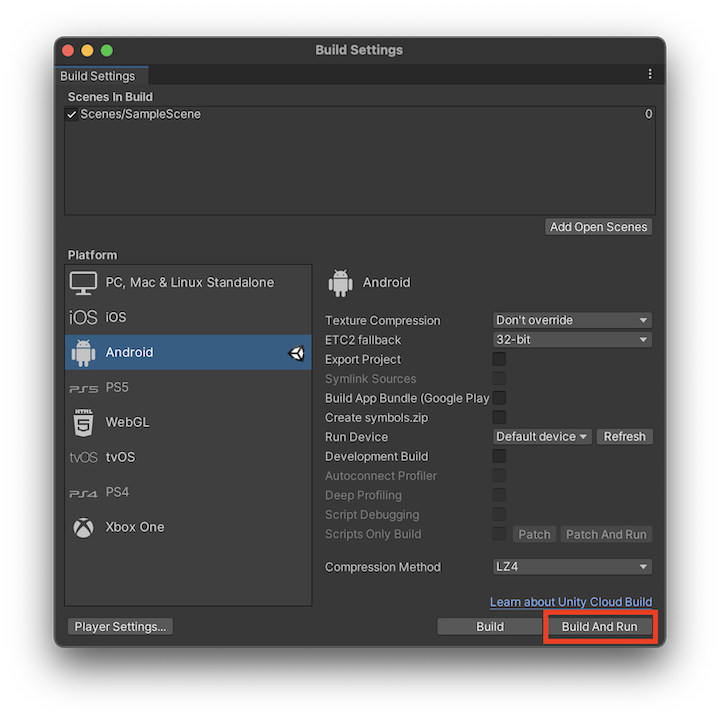
Connect your Android device to your computer, and click the Build and Run button. Save the build to your desired location and click Save. The app should automatically open on your phone after a short time.
Building for Android API level 31 with OpenCL
Starting in Android API 31, Android by default blocks usage to using system shared libraries unless the libraries are specified in the application’s manifest. ARDK needs access to the system OpenCL library for various features. If OpenCL is not available, ARDK falls back to using OpenGL, which results in worse performance. Niantic has determined that the performance difference can be up to 2x slower on certain devices.
ARDK 2.3 and later automatically enables OpenCL in the app manifest, but this additionally requires gradle 6.7.1 or better to properly build. The default version of gradle that comes with Unity 2021 is 6.1.1, which does not support the <uses-native-library> field in your manifest necessary to enable OpenCL. Use the following steps to configure your build to enable OpenCL when using Unity 2021 or earlier.
Install gradle 6.7.1 or better from https://gradle.org/releases/
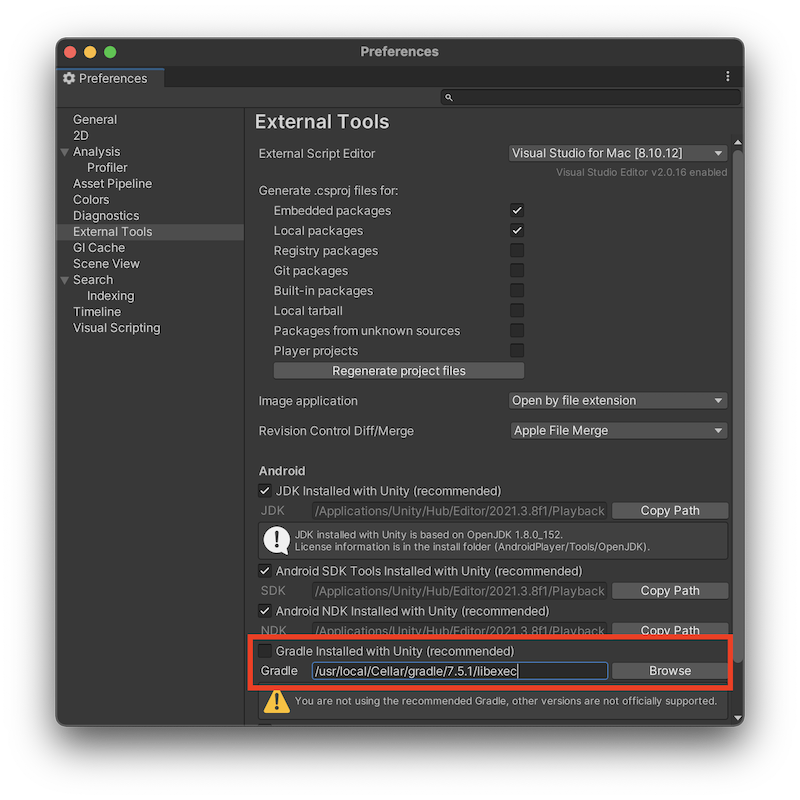
In Unity, under Preferences, External Tools, Android, disable using the default gradle that comes with Unity and replace with the path to your locally installed gradle 6.7.1. In the following example, the new path (
/usr/local/Cellar/gradle/7.5.1/libexec) is wherelib/gradle-launcher-7.5.1.jaris located.
If you’re building using the command line and not through the Unity UI, you can set a custom gradle path by setting the
AndroidExternalToolsSettings.gradlePathin your Unity build script.AndroidExternalToolsSettings.gradlePath = path-to-downloaded-gradle
In Unity, under Build Settings, click Player Settings. Then, under Publishing Settings enable Custom Base Gradle Template.
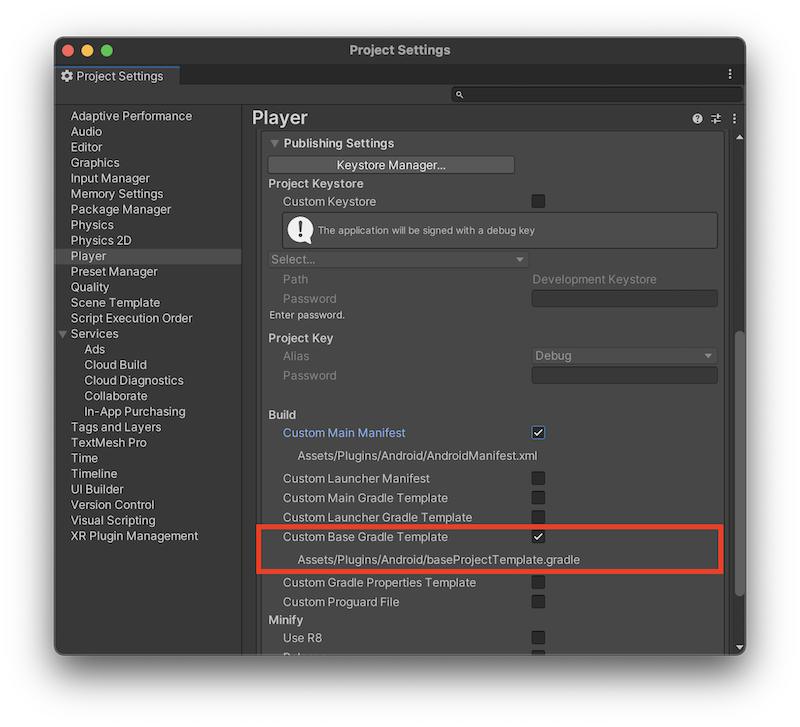
This should generate a template file in
Assets/Plugins/Android/baseProjectTemplate.gradle.
Modify the generated
baseProjectTemplate.gradlefile to force 4.2.0 (or newer) for the gradle plugin version underdependencies.
allprojects {
    buildscript {
        repositories {**ARTIFACTORYREPOSITORY**
            google()
            jcenter()
        }

        dependencies {
            // If you are changing the Android Gradle Plugin version, make sure it is compatible with the Gradle version preinstalled with Unity
            // See which Gradle version is preinstalled with Unity here https://docs.unity3d.com/Manual/android-gradle-overview.html
            // See official Gradle and Android Gradle Plugin compatibility table here https://developer.android.com/studio/releases/gradle-plugin#updating-gradle
            // To specify a custom Gradle version in Unity, go do "Preferences > External Tools", uncheck "Gradle Installed with Unity (recommended)" and specify a path to a custom Gradle version
            classpath 'com.android.tools.build:gradle:4.2.0'
            **BUILD_SCRIPT_DEPS**
        }
    }

    repositories {**ARTIFACTORYREPOSITORY**
        google()
        jcenter()
        flatDir {
            dirs "${project(':unityLibrary').projectDir}/libs"
        }
    }
}
Build your Android app and verify as usual.
Understanding ARDK Android Dependencies
ARDK automatically adds build dependencies, like ARCore, to your Android build. If you’re running into build issues with ARDK’s dependencies use the following information to understand what ARDK adds to your build.
The following custom AndroidManifest.xml is not a complete manifest that you can use as-is, but the highlighted lines show the dependencies that ARDK adds to your build. If needed, you can integrate these sections into a custom AndroidManifest.xml for your project to work around any build issues.
<manifest
    xmlns:android="http://schemas.android.com/apk/res/android"
    package="com.unity3d.player"
    xmlns:tools="http://schemas.android.com/tools">

    <uses-permission android:name="android.permission.CAMERA" />

    <!-- Read permission required to load vocab file -->
    <uses-permission android:name="android.permission.READ_EXTERNAL_STORAGE" />

    <!-- This tag indicates that this application requires ARCore.  This results in the application
    only being visible in the Google Play Store on devices that support ARCore. -->
    <uses-feature android:name="android.hardware.camera.ar" android:required="false"/>

    <application>
        <!-- This activity is critical for installing ARCore when it is not already present. -->
        <activity
            android:name="com.google.ar.core.InstallActivity"
            android:configChanges="keyboardHidden|orientation|screenSize"
            android:excludeFromRecents="true"
            android:exported="false"
            android:launchMode="singleTop"
        />

        <meta-data android:name="com.google.ar.core" android:value="optional" />
    </application>

    <queries>
        <package android:name="com.google.ar.core" />
    </queries>
</manifest>